 5a2df4432c - make the "base" field no longer public. It is accessible, but only through an `unsafe` method, because, it is unsafe. - add accessors to offest/mask fields. Because, it's not at all unsafe to access these, and it can be useful for bit-ops that are not part of the generic set of UTRA. - add Arc to AtomicCSR, and require `std` for AtomicCSR types. This should not break anything, I checked inside @foundation-devices keyOS and they don't seem to be using AtomicCSR anywhere. The Arc makes it a bit safer to clone the AtomicCSR base pointer and share it between threads, but it will have an impact on performance. The USB stack (which requires AtomicCSR) was regression testing and the impact seems minimal. Recall that the main purpose of AtomicCSR is to provide a CSR accessor that does not require a mutable reference to the base object. This can make certain Rust idioms a bit cleaner. We wrap the base accessor in Arc+Atomic to try and improve the safety of throwing the borrow checker under the bus, but it's still not perfect because hardware mutable state can have side-effects within hardware itself that cannot be modeled or checked by Rust's borrow checker. |
||
|---|---|---|
| .. | ||
| locales | ||
| src | ||
| Cargo.toml | ||
| README.md | ||
| repl_screenshot.png | ||

REPL
A simple demo application that provides a bare-bones REPL framework.
Copying This Demo to a New App
- Copy this demo application, and rename the relevant structures in its
Cargo.tomlandmain.rs. - Add it to the Workspace
default-membersandmembersarrays by editing./Cargo.toml - Edit the
manifest.jsonfile as documented in its README - Build using
cargo xtask app-image you_new_appto create a flashable Xous image with your app in it.
Details
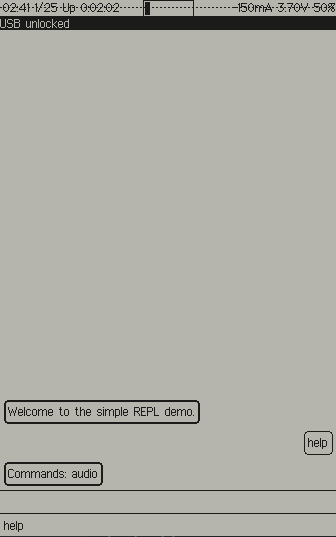
repl is a baseline demo application for Xous. It uses a chat-client
style interface (stacking bubbles of text, with user input right-aligned
and shell feedback left-aligned) to facilitate interactions.
It implements the basic envisioned structure of a Xous application, namely:
- Text input comes via the
ime-frontend - Graphical output is rendered via the
gam
Push Events and Listeners provides an overview of the flow of messages between an Xous application and the Xous Services.
The one demo command provisioned in the repl app plays a tone via
the codec service. This was chosen because it is about one of the most complicated
and comprehensive things you can do in the repl environment, as it requires
real-time callbacks to fill the audio buffer with new samples. If you have
specific questions about how the callbacks work, we encourage you to open
an issue in this repo and ask your question. Your questions will help us
direct effort toward building the documentation base.
To make your own command, copy the audio.rs template
in the apps/repl/src/cmds/ directory, or use this very basic echo
template:
use crate::{ShellCmdApi, CommonEnv};
use xous_ipc::String;

#[derive(Debug)]
pub struct Echo {
}

impl<'a> ShellCmdApi<'a> for Echo {
    cmd_api!(echo); // inserts boilerplate for command API

    fn process(&mut self, args: String::<1024>, _env: &mut CommonEnv) -> Result<Option<String::<1024>>, xous::Error> {
        Ok(Some(rest))
    }
}
The "verb" is the name of your command, and it is the argument to the cmd_api!() macro.
process() is your "main" function, and args is a string which contains the
rest of the line that was typed into the chat, minus the verb used to identify
your command (e.g. the arguments, but not tokenized or parsed in
any way). env contains some items in a common environment, for example, connections
to the GAM, LLIO server or other resources required by your implementation.
Once you've added your command to the directory, go to the cmds.rs file, and follow
the four-step instructions embedded within the file, starting around line 40.